Add an account
On this page
An account is a ledger of your books: a customer who buys on credit, a supplier you buy from, your cash and bank, and every sales, purchase, expense and tax account. You add one when a bill, receipt or journal needs an account the books do not have yet. A customer or supplier also carries the address and GST number the bills are made out to.
Open Head of Accounts
Press Alt+2 for Setup Accounts, then A for Head of Accounts. You can also click the menu with the mouse; every key in it is a letter you can press or click.
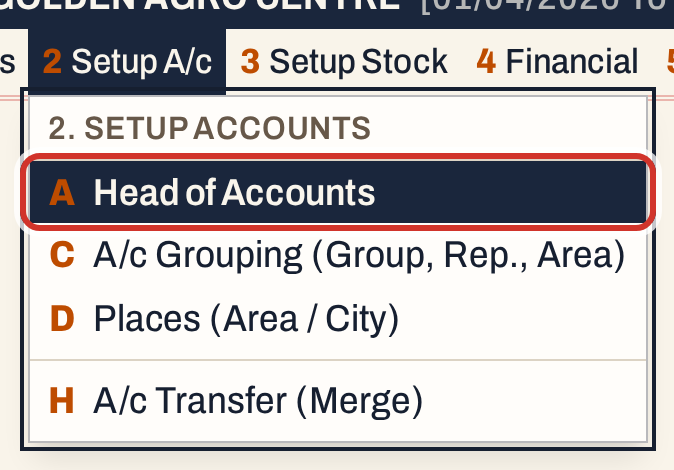 2 A: Setup Accounts, Head of Accounts.
The list shows every account with its city, type, group, phone, GSTIN, opening balance and current balance, and a Representative column when any account has a representative. It starts in the Find box: type part of a name, phone number, city or GSTIN to narrow the list, and check that the account is not already there.
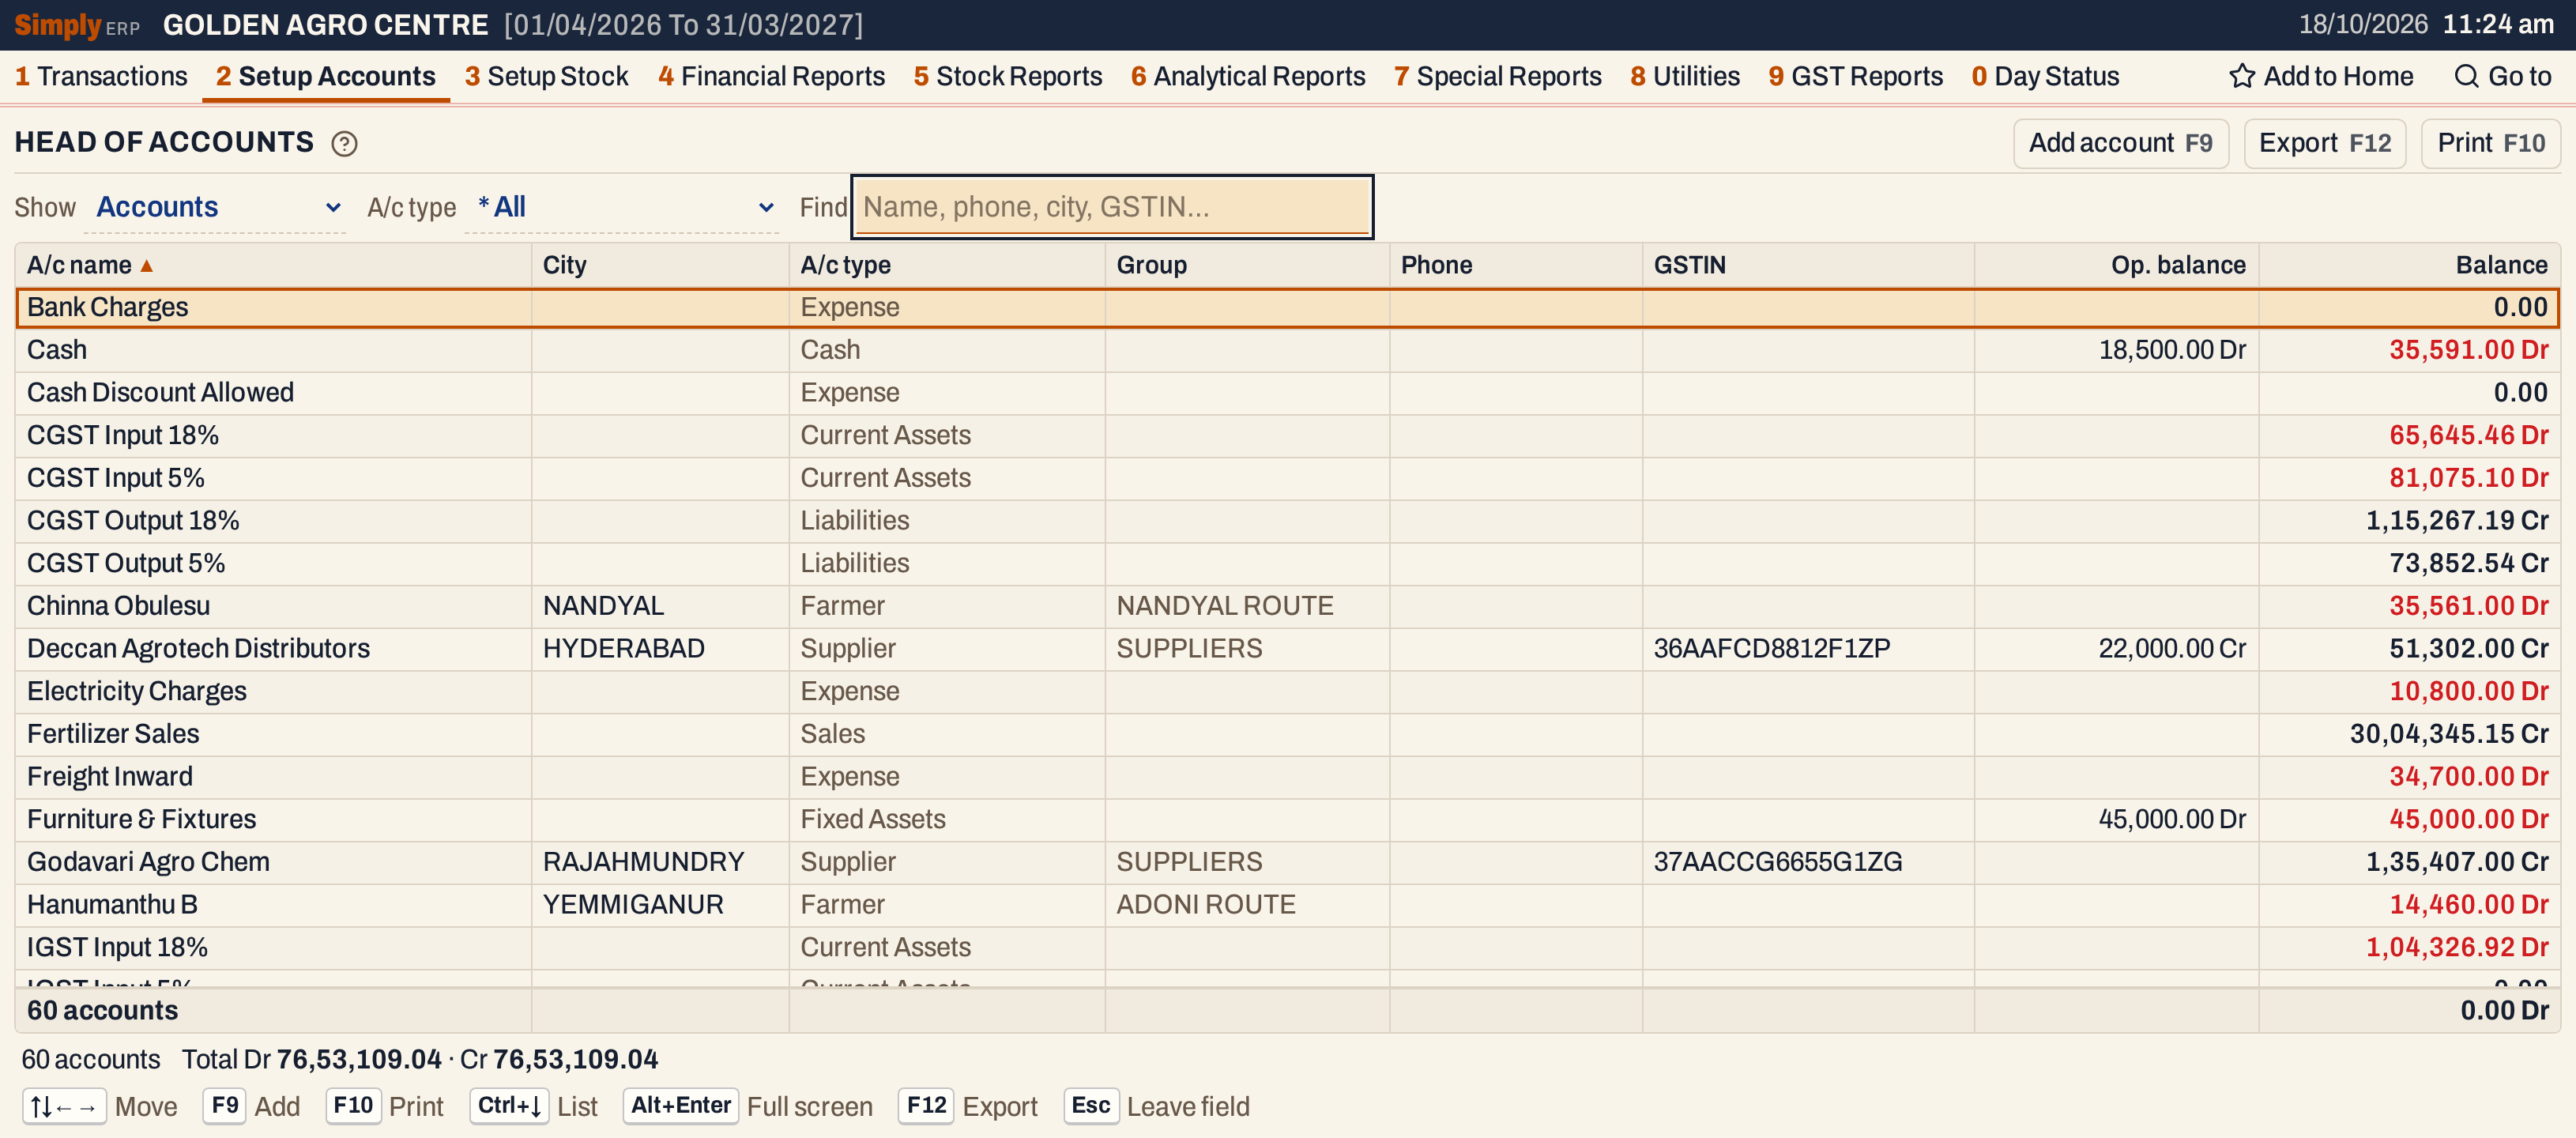 Look for the account first. A second account with the same ledger name is refused.
Press F9 (or click Add account) to add one.
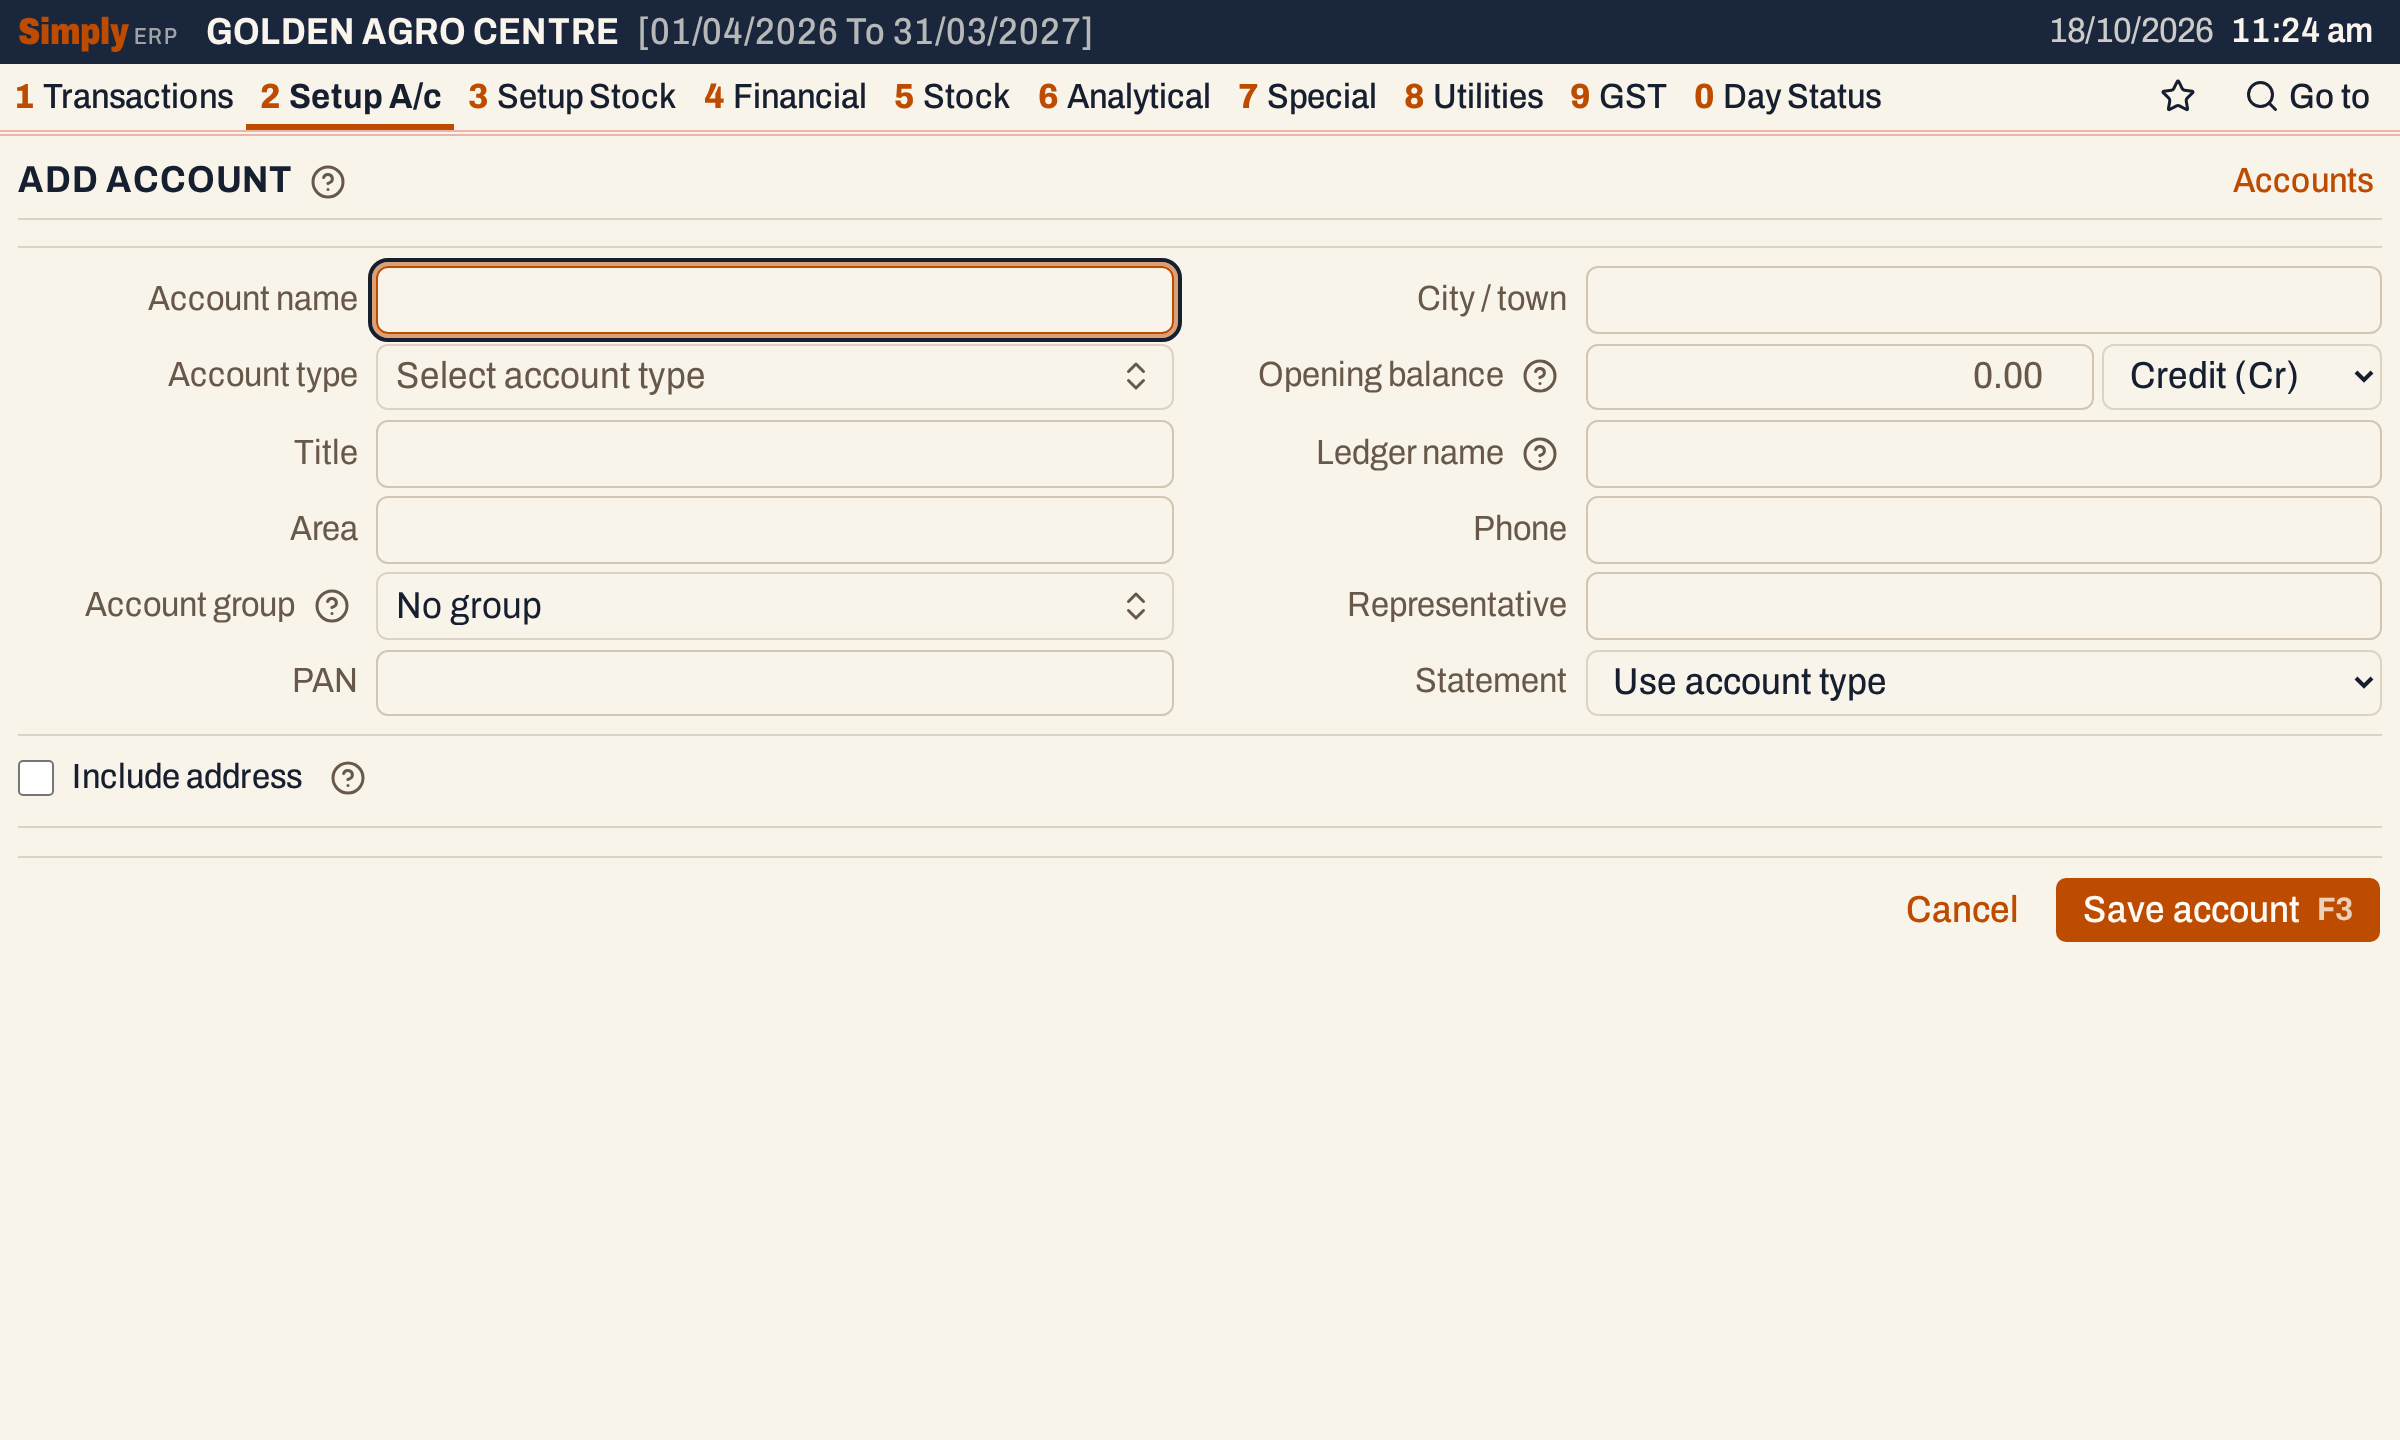 A new account. The cursor starts in Account name.
Name the account and choose its city
Type the Account name: for a customer or supplier, the person’s name. Press Enter and the cursor moves to City / town.
The city is chosen from your list of places (see Places). Typing lists the places that match, with the best match highlighted. Enter takes it. A city that is not in the list can be typed in full: saving the account adds it to the list of places.
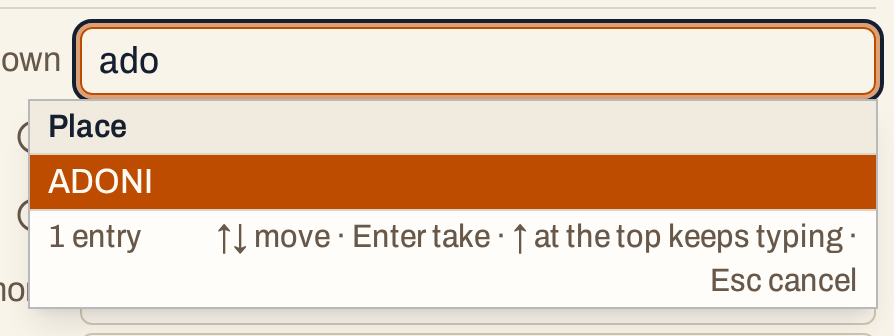 The city list. Enter takes the highlighted place.
As you type, the form builds two more fields from what you have entered:
- Ledger name is the name that bills, ledgers and every list show: the title, the name and the city, such as “Rayalaseema Agro Stores, Adoni”. The business name is used instead of the account name when there is one. You can type another form of the name here; clear it and it is built again. Two accounts cannot have the same ledger name; saving is refused with a message that asks you to add the city or another word.
- Area starts as the city in capitals (ADONI). You can type another area name; the area-wise reports group accounts by it.
Choose the account type
Press Enter in Account type and a list of types opens over the form. Type a few letters to narrow it, then press Enter on the type you want.
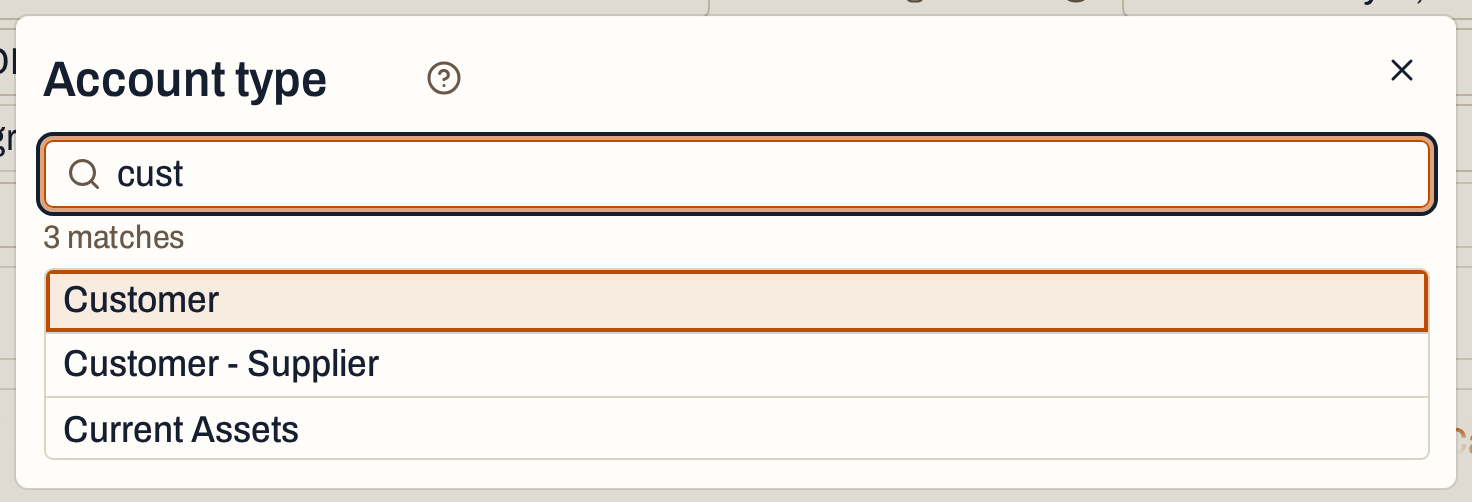 Three types match “cust”. Enter takes the highlighted one.
The type decides how the account is treated and which fields the form shows:
| Type | Use it for | What the form adds |
|---|---|---|
| Customer | A shop or party you sell to on credit | Business name, the address box ticked, GST number |
| Farmer | A farmer you sell to | The address box ticked, Aadhaar number in place of the GST number |
| Supplier | A company or dealer you buy from | Business name, the address box ticked, GST number |
| Customer - Supplier | A party you both buy from and sell to | Business name, the address box ticked, GST number |
| Bank | A bank account of the shop | Business name, the address box ticked, GST number |
| Cash | The cash in hand | Nothing more |
| Expense, Income | Rent, salaries, freight, interest and the like | Nothing more |
| Sales, Purchases, Capital, Fixed Assets and the other types | The accounts the books are built on | Nothing more |
The Statement field says which final account the account belongs to. It starts as “Use account type”: Sales, Purchases and the other trading types go to the Trading account, Income and Expense to Profit & Loss, and everything else, customers and suppliers included, to the Balance sheet. You change it only for an account that belongs elsewhere.
Enter the opening balance
Opening balance is what the account stood at on the first day of the financial year (01/04/2026 in these books). Enter zero for a new account. Choose the side next to it:
- Debit (Dr) for what a customer owes you, and for cash, bank and assets;
- Credit (Cr) for what you owe a supplier, and for capital and other liabilities.
The side starts on Credit. Check it for a customer: a customer who owes you ₹8,400 is a debit. Enter takes you from the amount to the side, but does not leave it: choose Debit or Credit (type D or C) and press Tab to go on.
Fill the rest as you need it. Phone is the account’s phone number; Title is a title that comes before the name in the ledger name; Representative is the representative the account is assigned to, which the representative-wise reports group by; PAN is the account’s PAN.
Account group puts the account in one of your account groups, such as a sales route or “Suppliers”. Groups arrange accounts in reports such as the Balance Sheet (Grouped). See Account grouping to put many accounts in a group at once.
A customer, supplier or bank account with a GST number also needs its Business name, the name the GST registration is in. The form will not save without it.
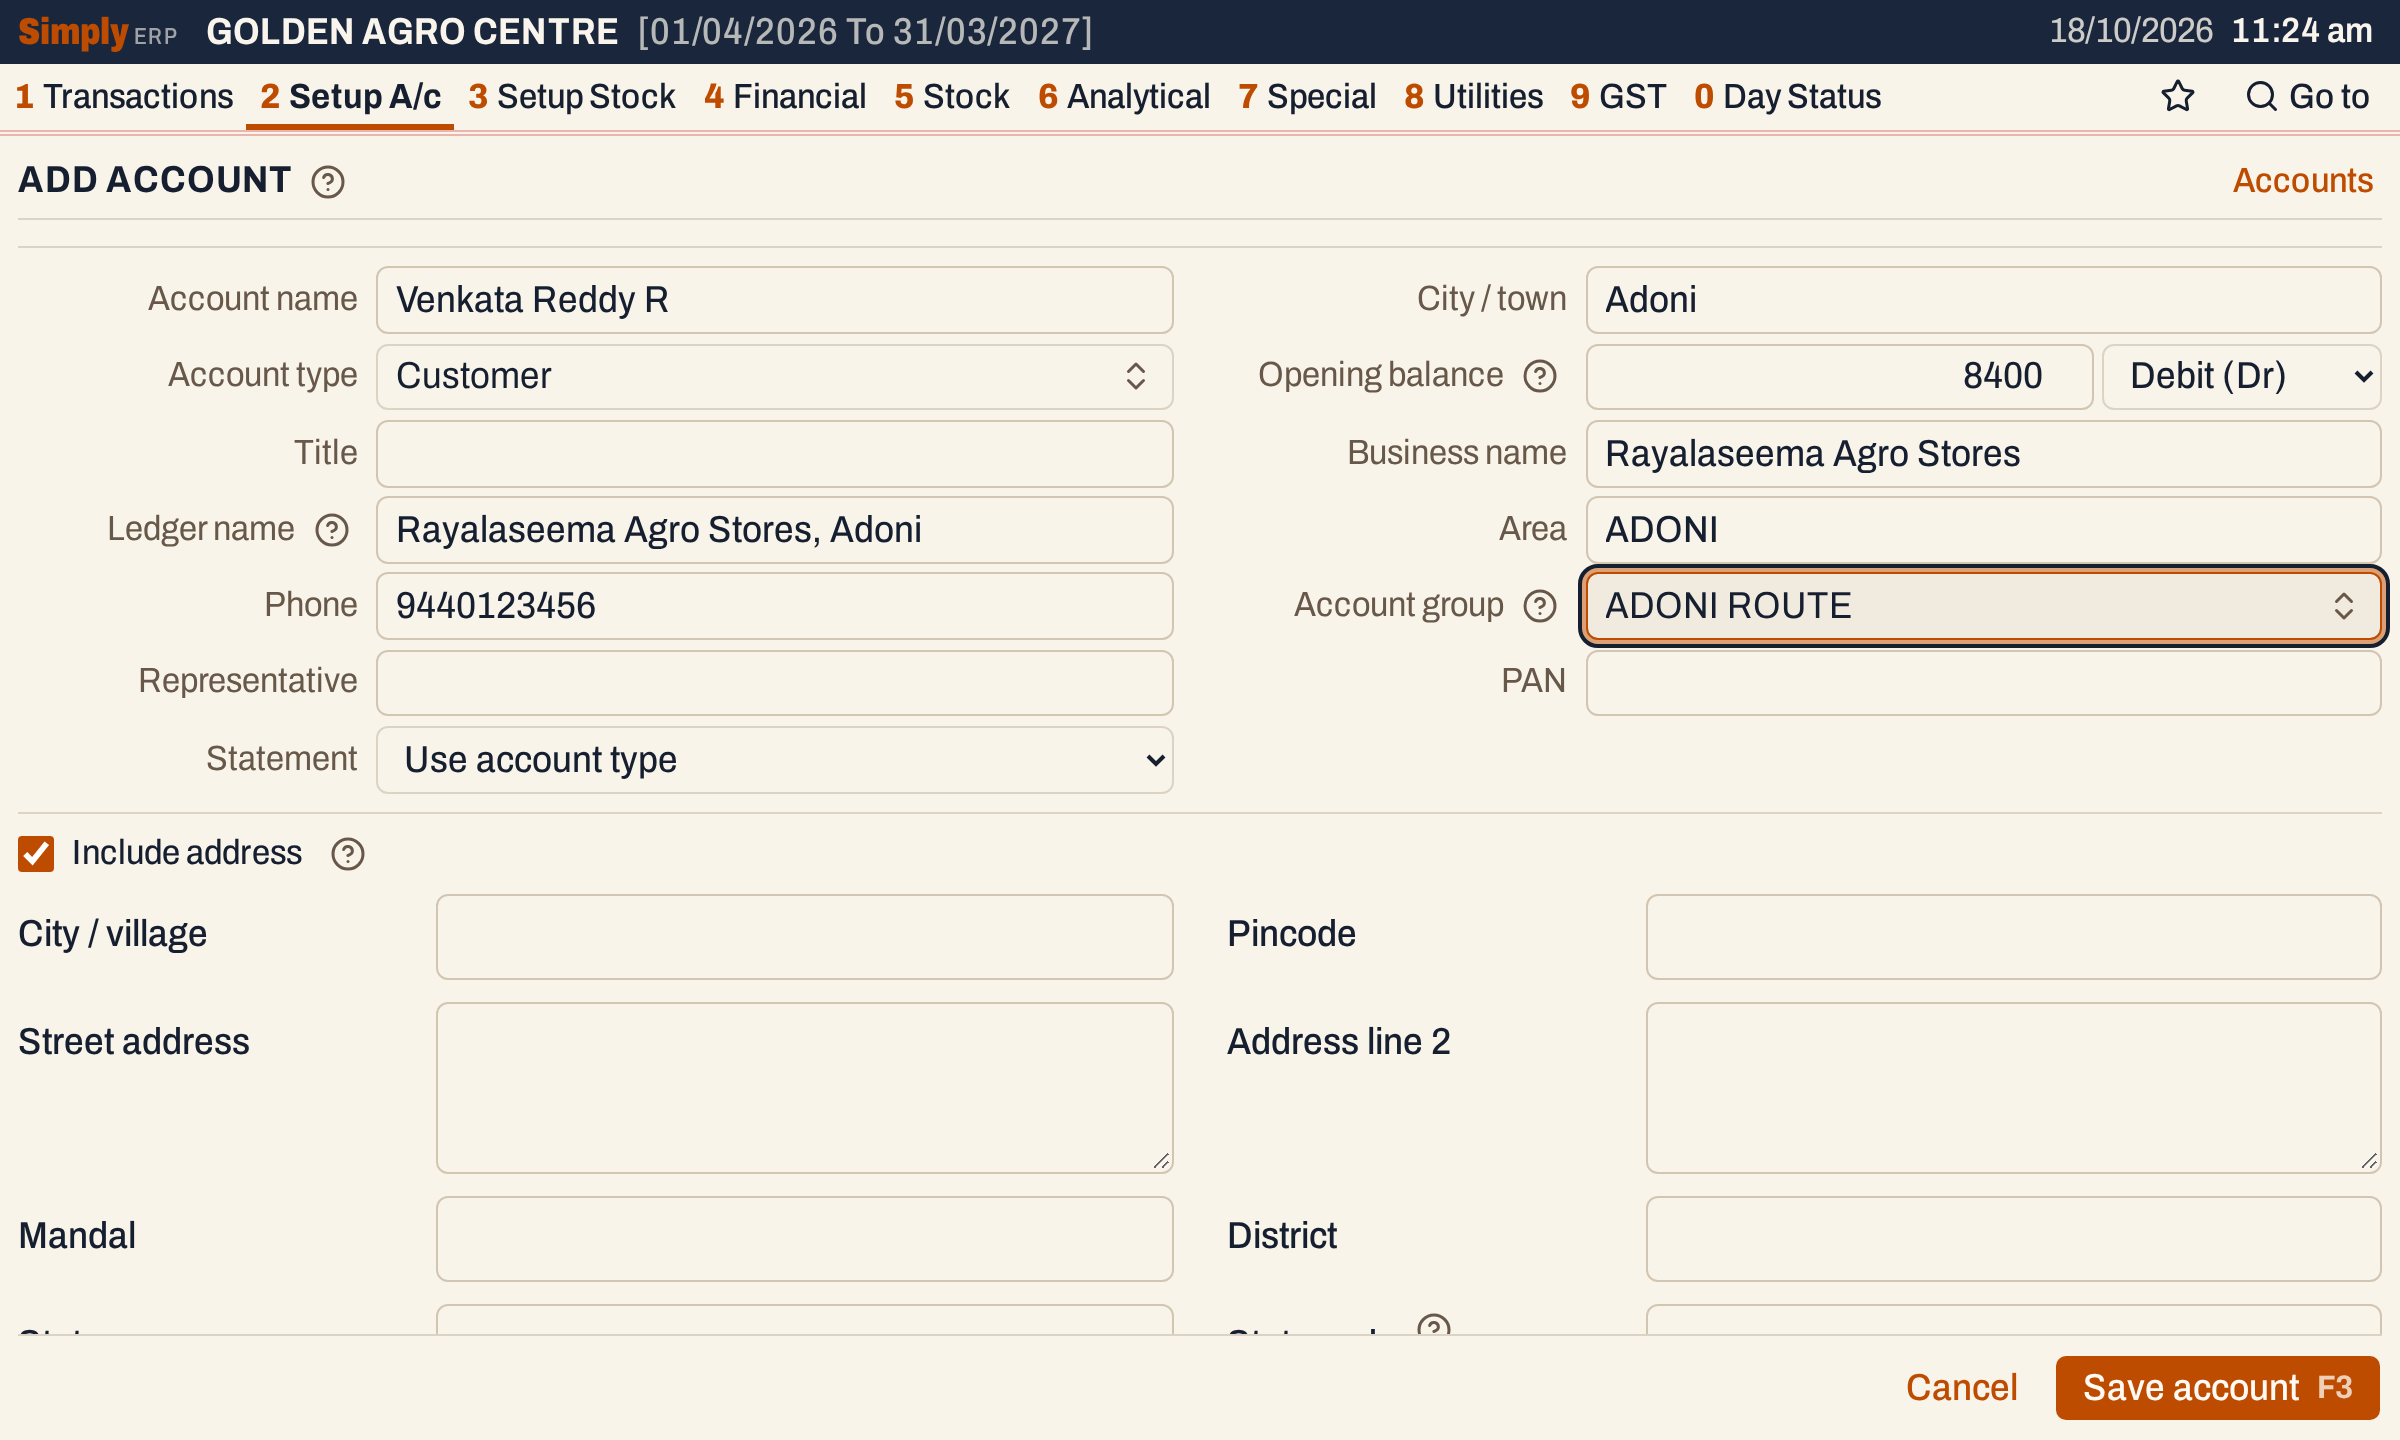 The ledger name is built from the business name and the city.
Add the address and GST number
For customers, farmers, suppliers and banks the Include address box is ticked for you. Tick it for any other type that needs an address. Then fill:
- City / village, Street address, Address line 2, Pincode, Mandal, District and State.
- GST number. Leave it empty for an unregistered party. The first two digits of the number give the State code, which fills in by itself and cannot be changed while a GST number is there. Without a GST number, type the two-digit state code yourself. The state code is required, and bills use it to decide between CGST and SGST, and IGST.
- Contact person, Other phone, and the Transport this party’s goods usually go by. A bill for the party starts with that transport when its own transport is empty.
- Address PAN, and the licence numbers (P.L. No., A.G.L. No. (Retail), A.G.L. No. (Wholesale), S.L. No. and iFMS ID) that you want kept with the party.
A GST number needs the city or village, the street address and a six-digit pincode with it.
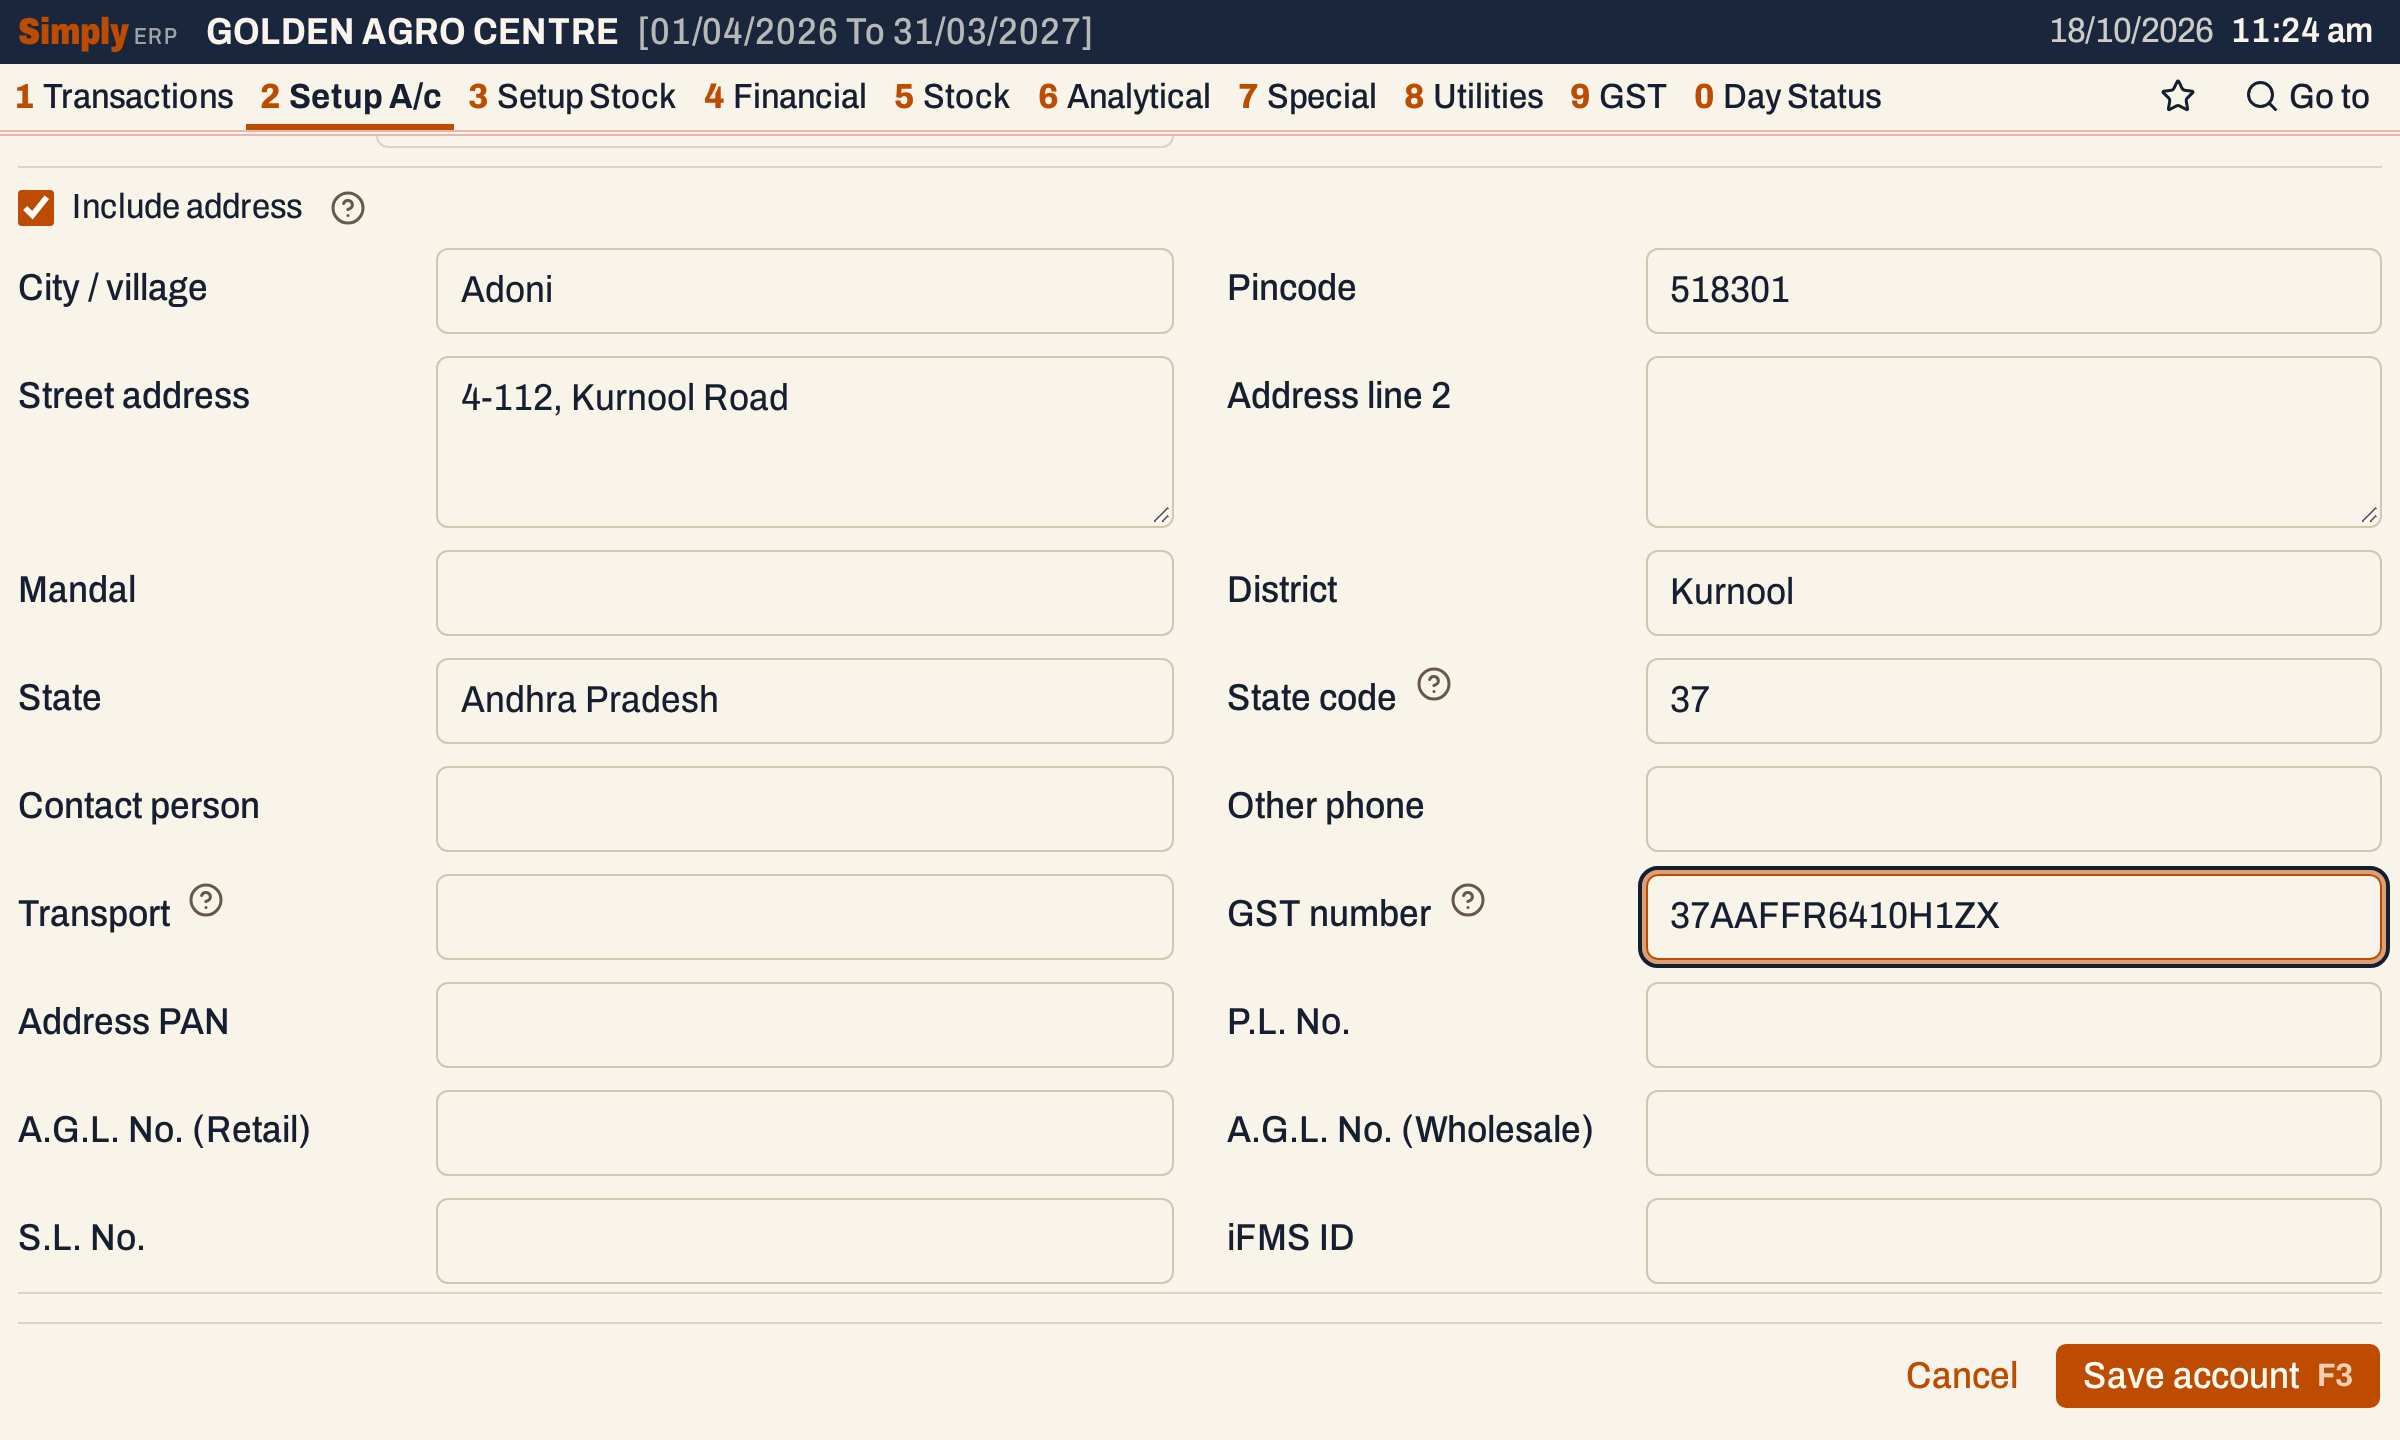 The state code 37 comes from the first two digits of the GST number.
An account can have more than one address, for a party with several branches. Add the others later; see Change an account.
Save the account
Press F3 (or click Save account). The account is saved, a notice says “Account added” and the account opens: its current balance, its details and its address.
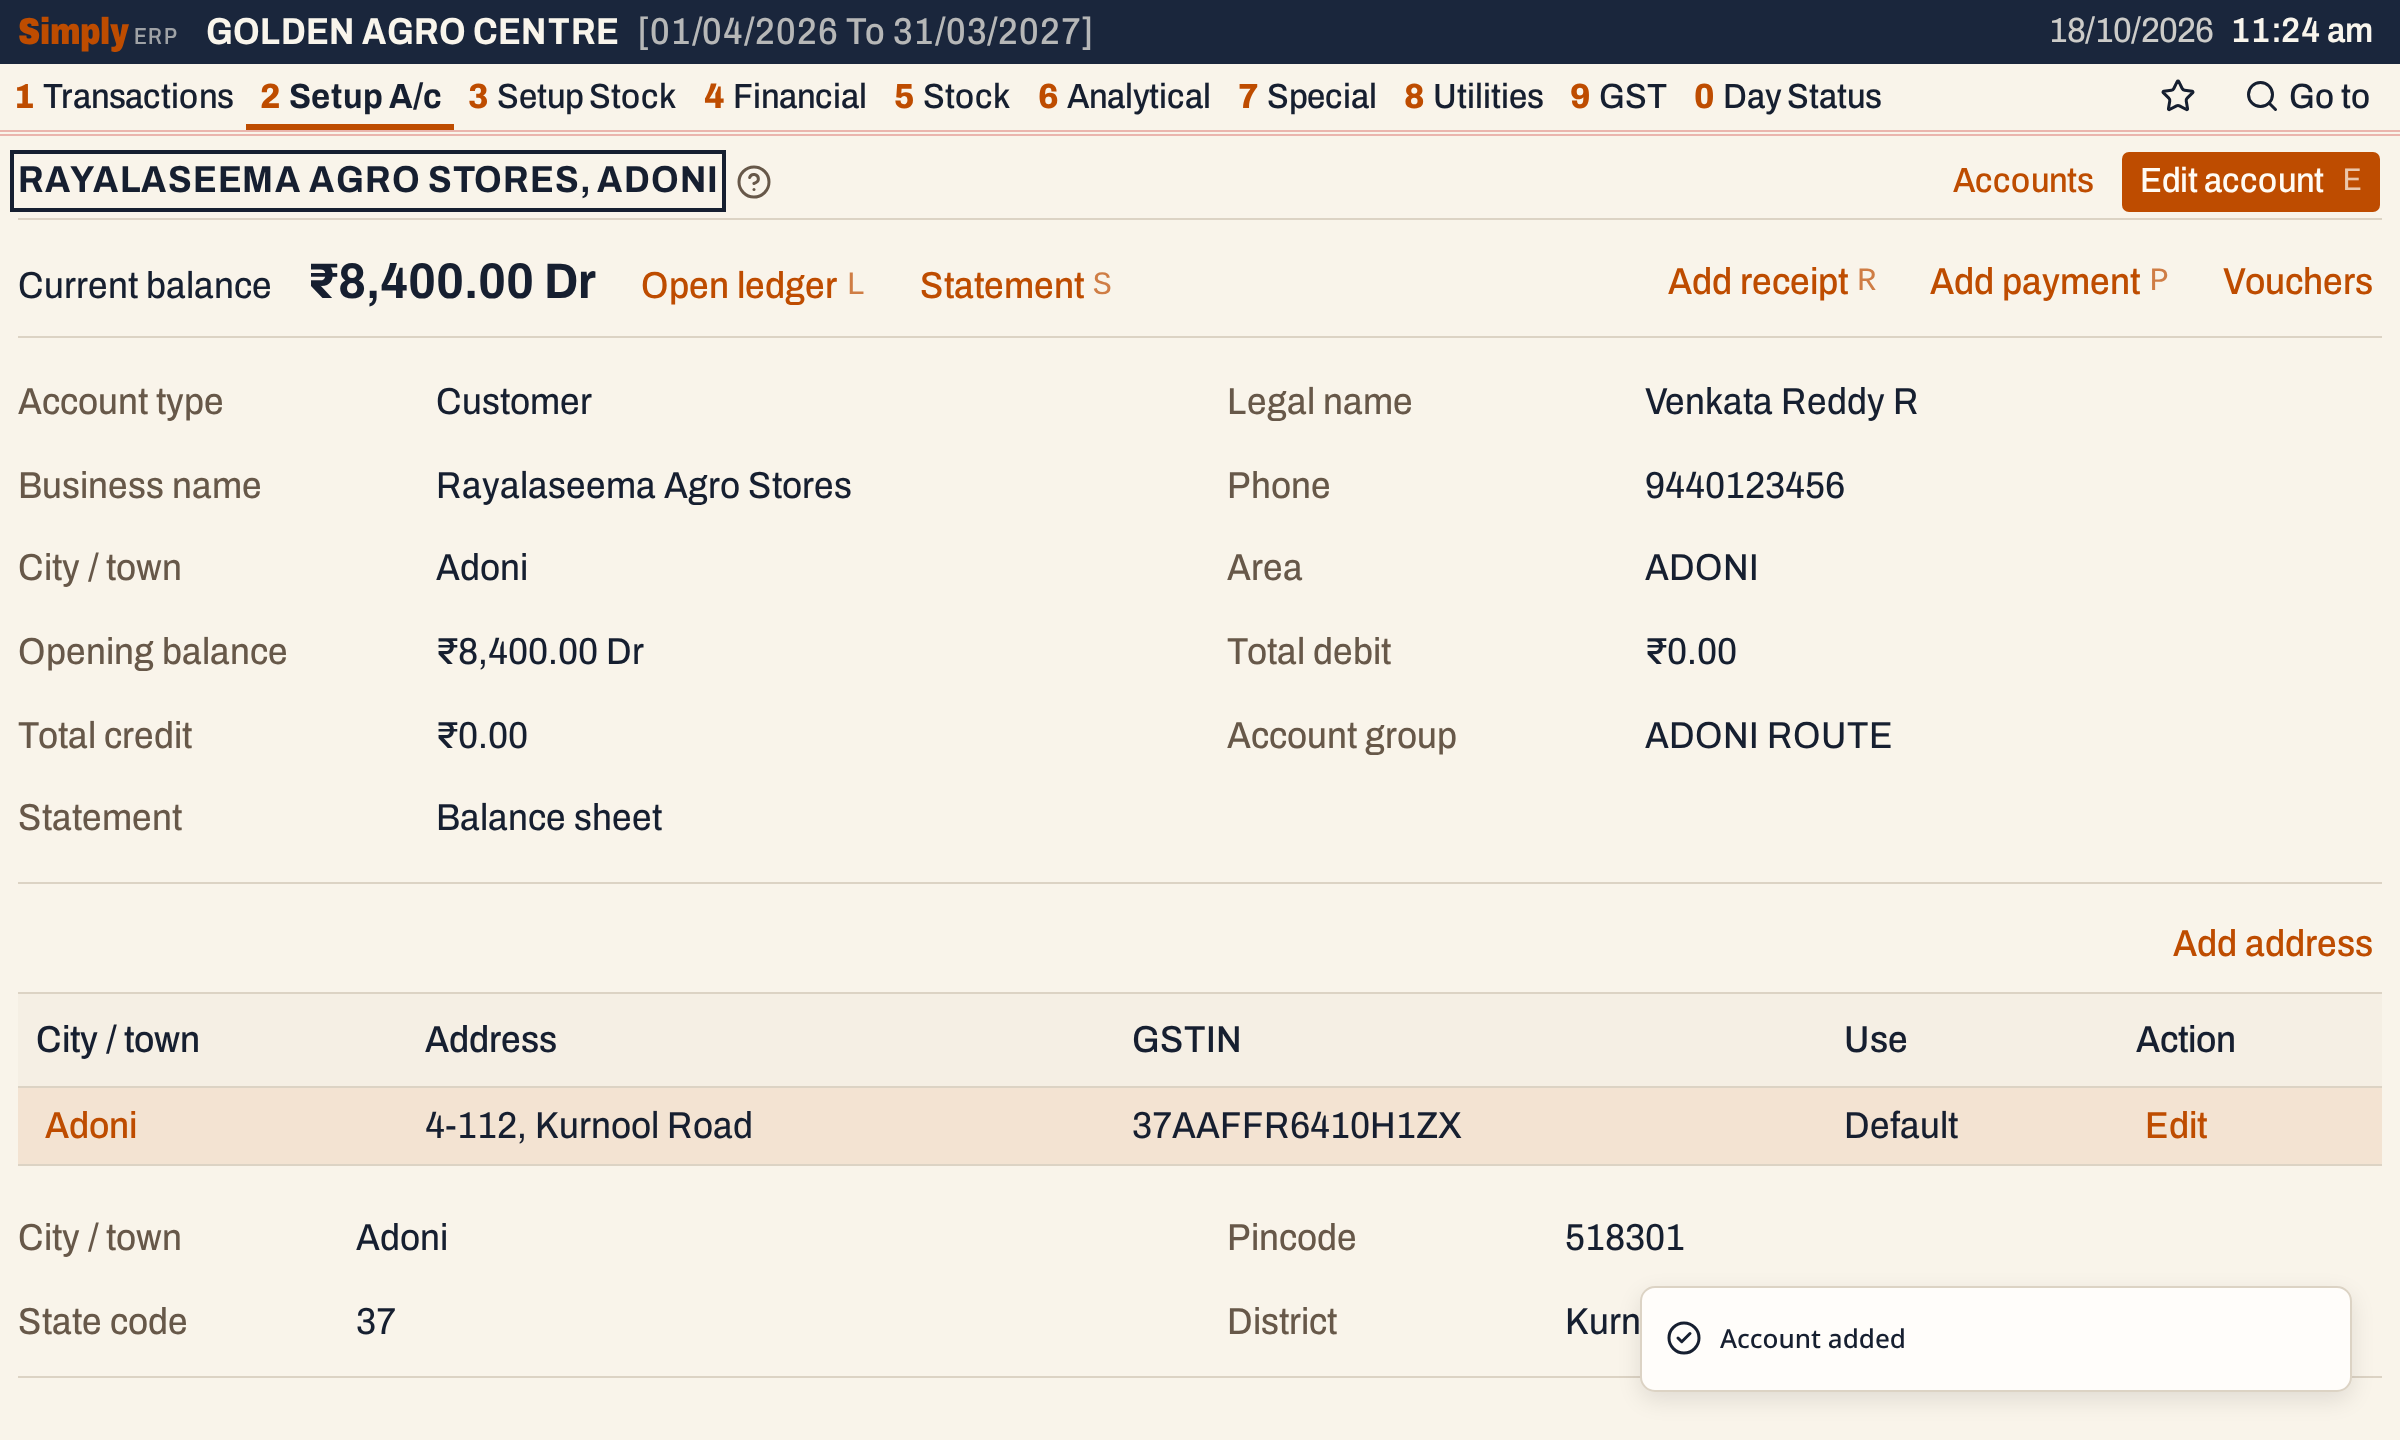 The new account. Keys E, L, S, R and P edit it, open its ledger and statement, and add a receipt or a payment.
In Head of Accounts it is now in the list, with its city, type, group, phone, GSTIN and balances.
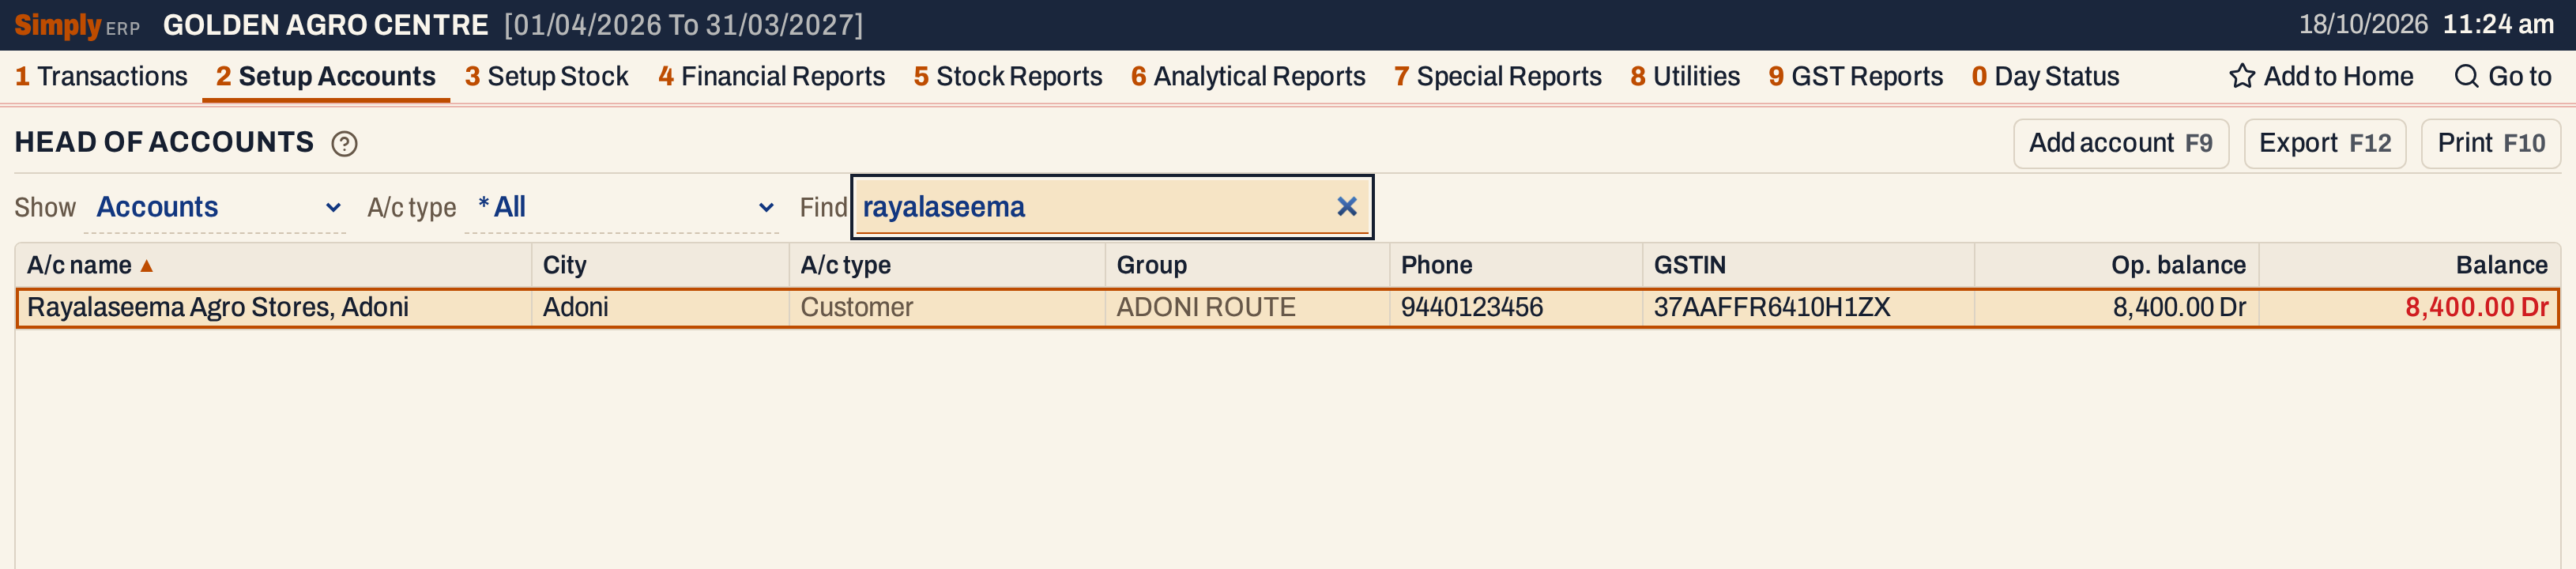 The account in the list.
What saving does to your books
- The account is added with its names, type, group, representative, area, phone and PAN.
- A non-zero opening balance is posted to the account’s ledger as an “Opening balance” entry dated the first day of the financial year, on the side you chose. With zero, nothing is posted.
- The address is saved with the account and is its default address. A bill made out to the account takes its place, state and GST number from there.
- The city is added to your list of places if it is not there.
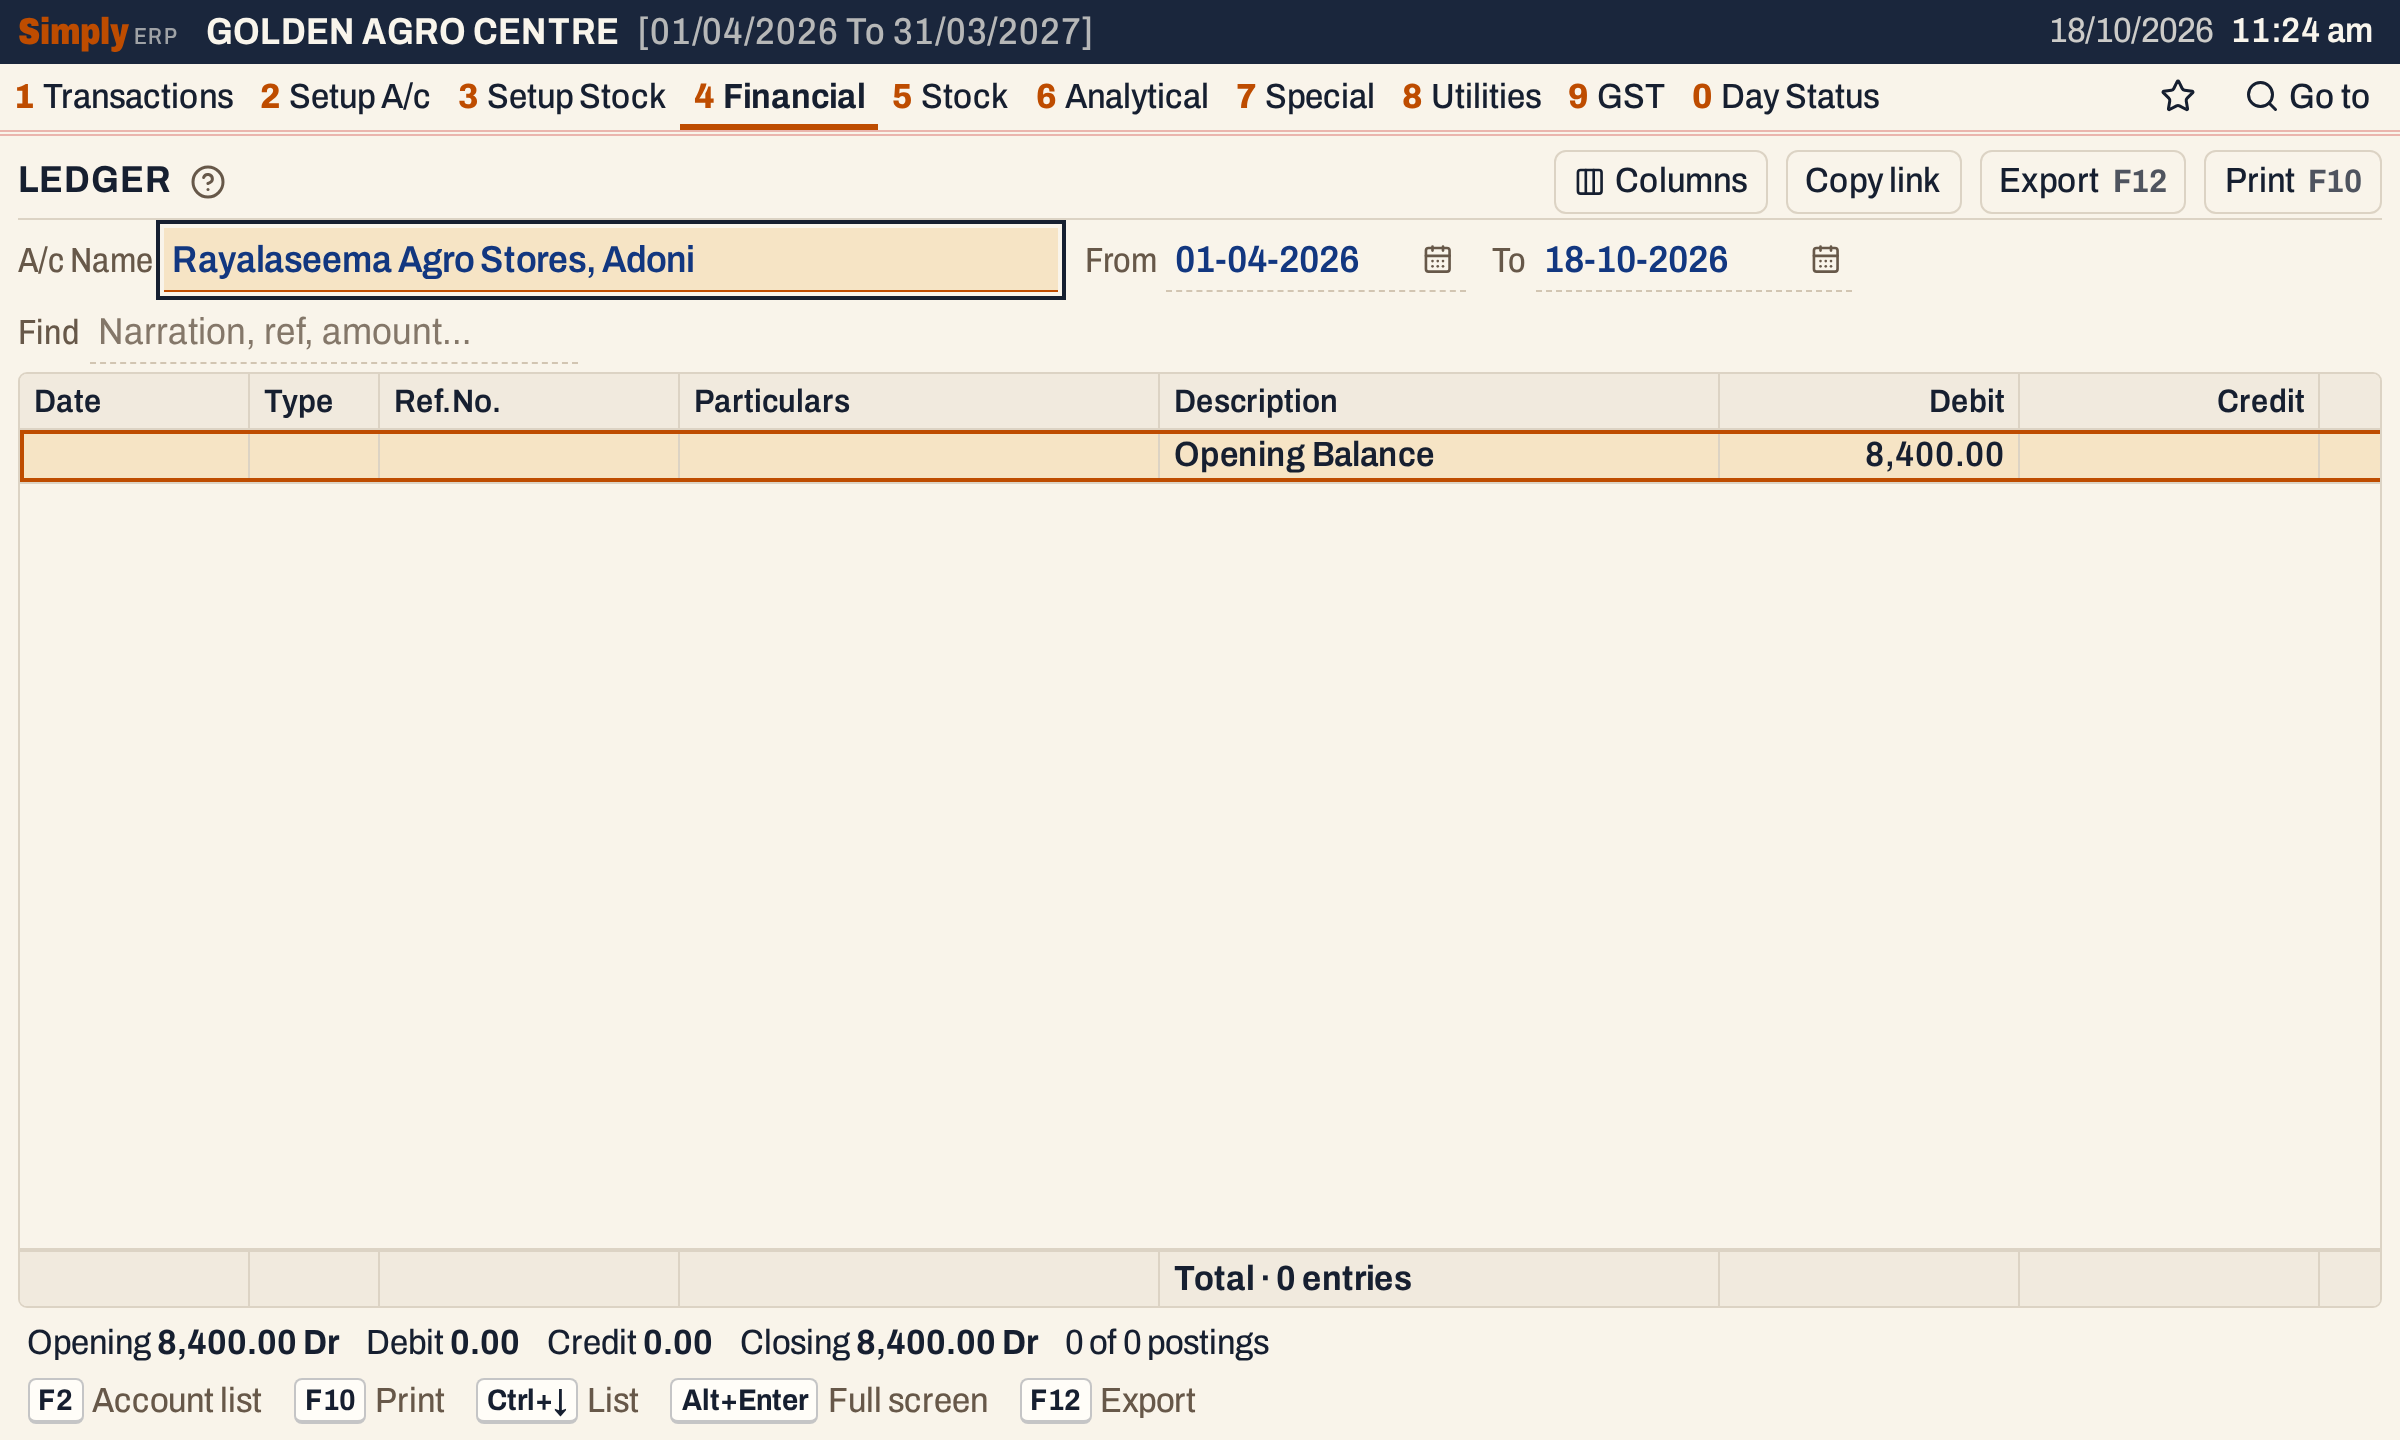 The opening balance in the Ledger.
The opening balance also shows in the Trial Balance on the debit side, and in the account’s current balance until bills and receipts change it.
An account of another type has fewer fields. An expense has no business name and no address unless you tick the box.
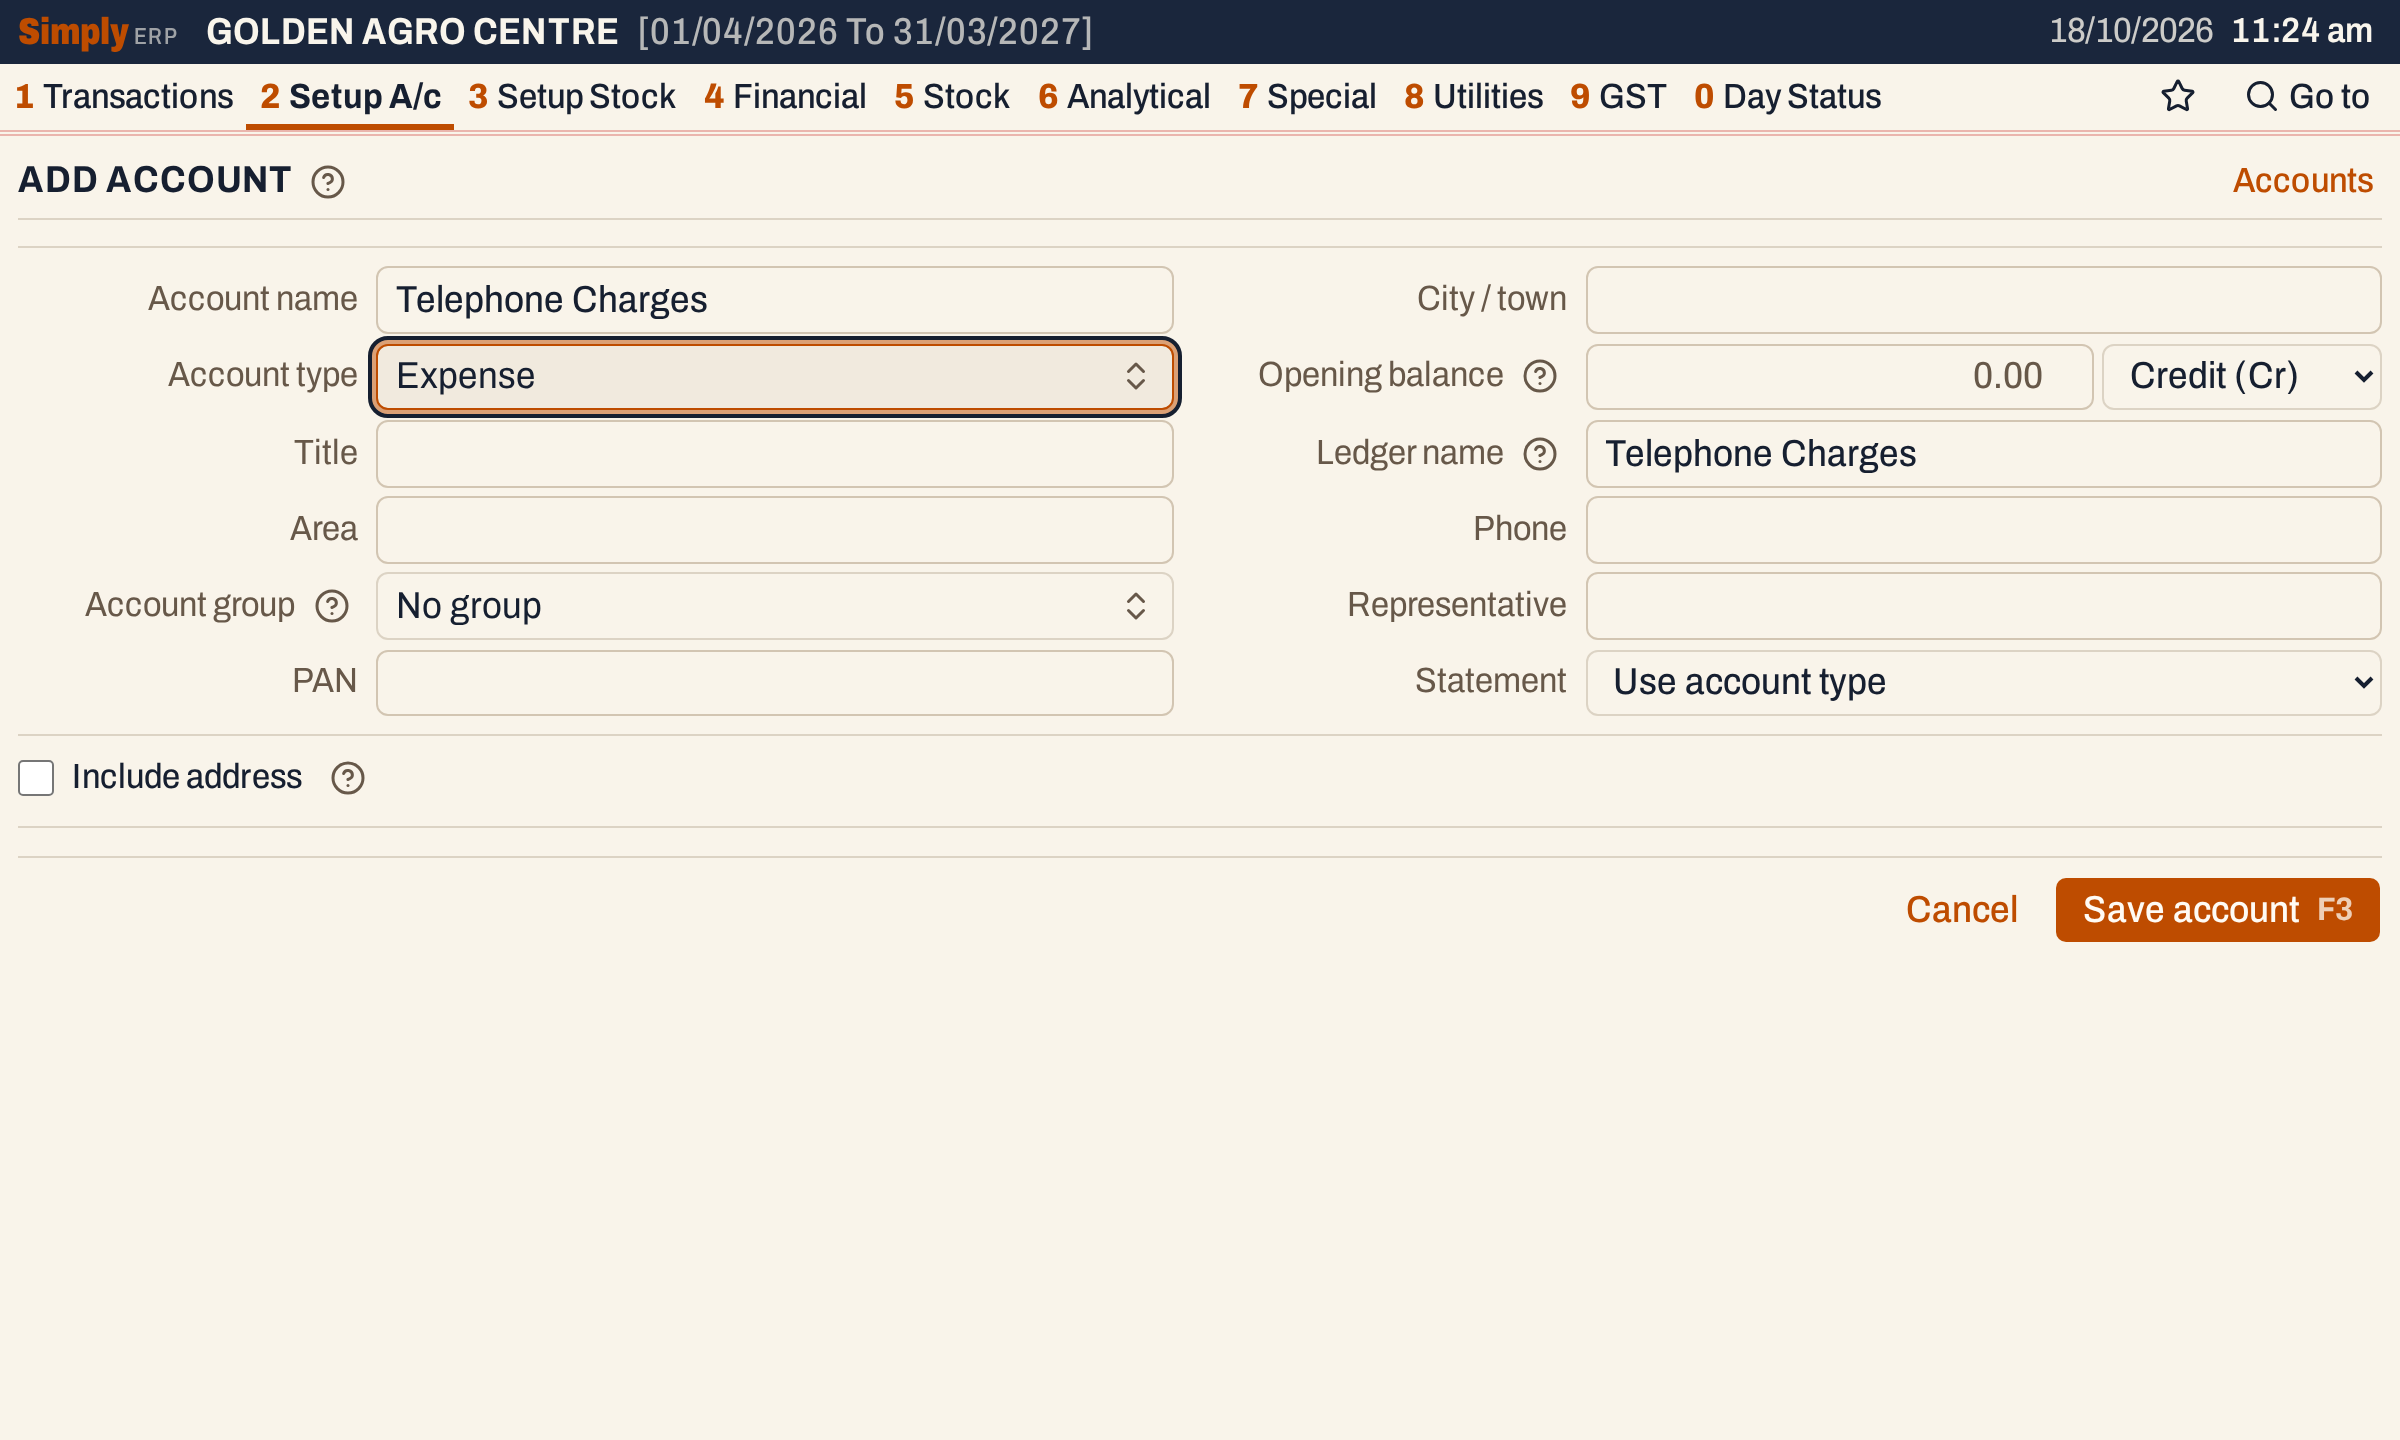 An Expense account: name, type and the common fields only.
Keys on this screen
| Key | What it does |
|---|---|
| Enter | Next field; in Account type it opens the list. It does not leave the Balance side or Statement choices: use Tab there |
| Tab | Next field, through every field including the choices |
| F2 | Open the list of the field you are in |
| F3 | Save the account |
| Ctrl+S | Save the account |
| Esc | Leave the field; in a list, close it |
In Head of Accounts: F9 adds an account, Enter opens the one under the cursor, F10 prints the list and F12 exports it to Excel. On a saved account, E edits it, L opens its ledger, S its statement, R adds a receipt and P a payment.
On a Mac, ⌘ stands for Ctrl.
Common questions
What if the customer is not in the books when I am making a bill? Press Alt+N in the customer field of the bill. This screen opens with the name typed so far, and saving it returns to the bill with the new account chosen. See Add a party or item from a bill.
The form will not save a customer with a GST number. Fill the Business name, and the city or village, street address and pincode of the address. A GST number is checked for its 15-character form, and its first two digits fill in the state code.
I chose the wrong side for the opening balance. Open the account (E on its screen) and change the side. The opening entry in the ledger changes with it. See Change an account.
Is there a way to remove an account I added by mistake? An account is not deleted. Merge it into the account it should have been with Merge accounts.
Updated 4 November 2026.